SRV_VOUCH
Co je to VOUCH proxy?
an SSO solution for Nginx using the auth_request module.
Převzato z: https://github.com/vouch/vouch-proxy

Odkazy ke studiu:
Návod na instalaci
1) Založíme nový LXC container
dle tohoto návodu: https://intranet.rs-kovarik.cz/srvtemplate Místo SRV_TEMPLATE zadat jméno SRV_VOUCH
2) Připojíme se k serveru přes terminál
ssh připojení k Turiisu a pak přes lxc-attach
Příkazy:
lxc-attach SRV_VOUCH
3) Stažení zdorjových kódů VOUCH proxy
Příkazy:
wget --output-document=vouch.zip https://github.com/vouch/vouch-proxy/archive/master.zip
unzip vouch.zip
cd vouch-proxy-master/
4) Instalace go and git
Příkazy:
apt install golang git
5) Build sources to VOUCH proxy
Příkazy:
cd vouch-proxy-master/
./do.sh goget
./do.sh build
6) Přesun VOUCH proxy
Příkazy:
cd ..
mv vouch-proxy-master/* /opt/vouch-proxy
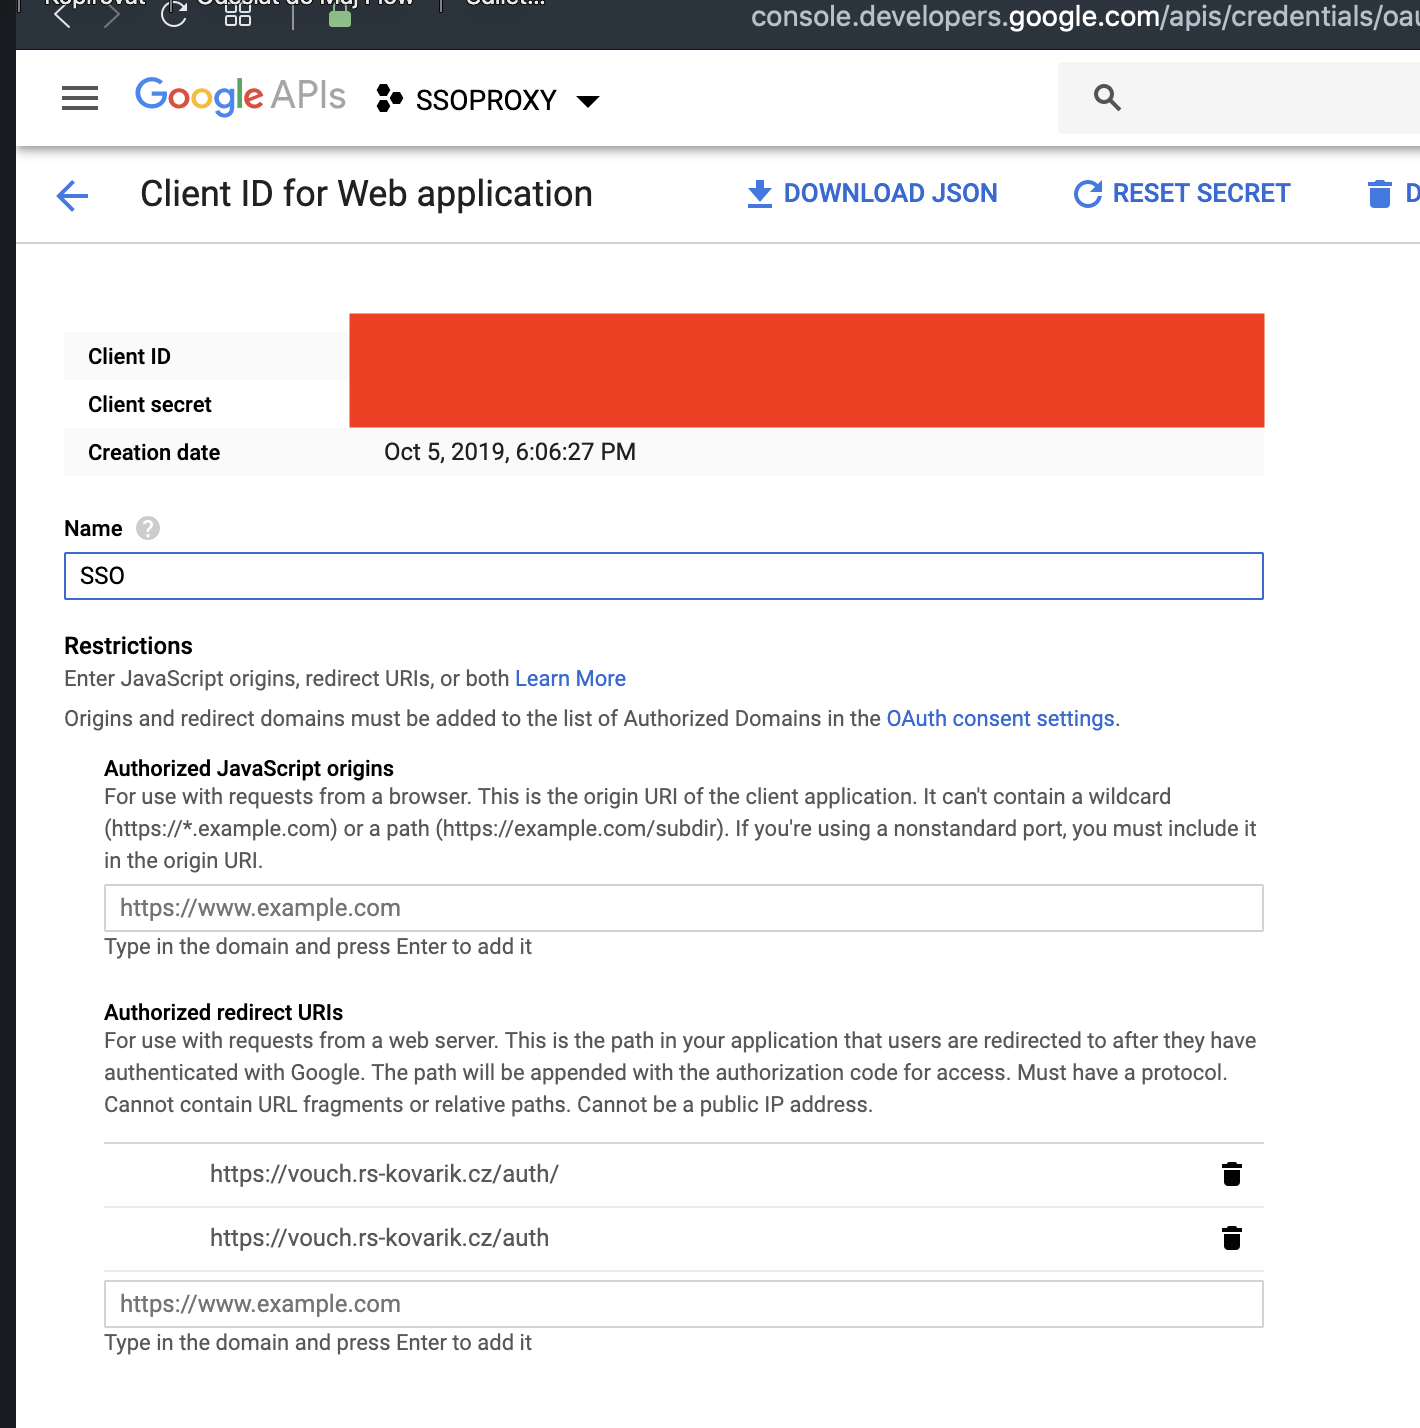
7) Konfigurace VOUCH proxy
Create a Google OAuth App and configure Lasso
use Google’s developer console to generate the
client_idand theclient_secretand to set yourcallback_urls.Add these toconfig/config.yml

Přidáme si v google naše authorized redirect URIs dle naší konfigurace v bodu 9) tohoto návodu.
Příkazy:
cd /opt/vouch-proxy/config/
nano config.yml
Vzorová konfigurace:
# vouch config
# you should probably start with one of the other configs in the example directory
# vouch proxy does a fairly good job of setting its config to sane defaults
# be aware of your indentation, the only top level elements are `vouch` and `oauth`.
vouch:
# logLevel: debug
logLevel: info
# testing - force all 302 redirects to be rendered as a webpage with a link
# if you're having problems, turn on testing
testing: false
listen: 0.0.0.0
port: 9090
# domains -
# each of these domains must serve the url https://vouch.$domains[0] https://vouch.$domains[1] ...
# so that the cookie which stores the JWT can be set in the relevant domain
# you usually *don't* want to list every individual website that will be protected
# if you have siteA.internal.yourdomain.com and siteB.internal.yourdomain.com
# then your domains should be set as yourdomain.com or perhaps internal.yourdomain.com
# usually you'll just have one.
# Comment `domains:` out if you set allowAllUser:true
domains:
- gmail.com
- rs-kovarik.cz
# set allowAllUsers: true to use Vouch Proxy to just accept anyone who can authenticate at the configured provider
# allowAllUsers: false
# Setting publicAccess: true will accept all requests, even without a cookie.
# If the user is logged in, the cookie will be validated and the user header will be set.
# You will need to direct people to the Vouch Proxy login page from your application.
# publicAccess: false
# whiteList - (optional) allows only the listed usernames
# usernames are usually email addresses (google, most oidc providers) or login/username for github and github enterprise
whiteList:
- your_google_account@gmail.com
jwt:
# secret - a random string used to cryptographically sign the jwt
# Vouch Proxy complains if the string is less than 44 characters (256 bits as 32 base64 bytes)
# if the secret is not set here then..
# look for the secret in `./config/secret`
# if `./config/secret` doesn't exist then randomly generate a secret and store it there
# in order to run multiple instances of vouch on multiple servers (perhaps purely for validating the jwt),
# you'll want them all to have the same secret
secret: 78_znaku_random_STRING
issuer: Vouch
# number of minutes until jwt expires
maxAge: 240
# compress the jwt
compress: true
cookie:
# name of cookie to store the jwt
name: VouchCookie
# optionally force the domain of the cookie to set
# domain: yourdomain.com
secure: true
httpOnly: true
# Set cookie maxAge to 0 to delete the cookie every time the browser is closed.
maxAge: 14400
session:
# name of session variable stored locally
name: VouchSession
# key - a cryptographic string used to store the session variable
# if the key is not set here then it is generated at startup and stored in memory
# Vouch Proxy complains if the string is less than 44 characters (256 bits as 32 base64 bytes)
# you only want to set this if you're running multiple user facing vouch.yourdomain.com instances
key: 87_znaku_random_STRING
headers:
jwt: X-Vouch-Token
querystring: access_token
redirect: X-Vouch-Requested-URI
# GENERAL WARNING ABOUT claims AND tokens
# all of these config elements can cause performance impacts due to the amount of information being
# moved around. They will get added to the Vouch cookie and (possibly) make it large. The Vouch cookie will
# get split up into several cookies. Every request will process the cookies in order to extract and create the
# additional headers which get returned. But if you need it, you need it.
# With large cookies and headers it will require additional nginx config to open up the buffers a bit..
# see `large_client_header_buffers` http://nginx.org/en/docs/http/ngx_http_core_module.html#large_client_header_buffers
# and `proxy_buffer_size` http://nginx.org/en/docs/http/ngx_http_proxy_module.html#proxy_buffer_size
# claims - a list of claims that will be stored in the JWT and passed down to applications via headers
# By default claims are sent down as headers with a prefix of X-Vouch-IdP-Claims-ClaimKey
# Only when a claim is found in the user's info will the header exist. This is optional. These are case sensitive.
claims:
- groups
- given_name
# these will result in two headers being passed back to nginx
# X-Vouch-IdP-Claims-groups
# X-Vouch-IdP-Claims-given_name
# claimheader - Customizable claim header prefix (instead of default `X-Vouch-IdP-Claims-`)
# claimheader: My-Custom-Claim-Prefix
# accesstoken - Pass the user's access token from the provider. This is useful if you need to pass the IdP token to a downstream
# application. This is optional.
# accesstoken: X-Vouch-IdP-AccessToken
# idtoken - Pass the user's Id token from the provider. This is useful if you need to pass this token to a downstream
# application. This is optional.
# idtoken: X-Vouch-IdP-IdToken
db:
file: data/vouch_bolt.db
# test_url - add this URL to the page which vouch displays
test_url: https://vouch.rs-kovarik.cz
# webapp - WIP for web interface to vouch (mostly logs)
# webapp: true
#
# OAuth Provider
# configure ONLY ONE of the following oauth providers
#
oauth:
provider: google
# get credentials from...
# https://console.developers.google.com/apis/credentials
client_id: YOUR_CLIENT_ID.apps.googleusercontent.com
client_secret: YOUR_SECRET
callback_urls:
- https://vouch.rs-kovarik.cz/auth
preferredDomain: gmail.com
# endpoints set from https://godoc.org/golang.org/x/oauth2/google
8) puštění po reboot
Příkazy:
crontab -e
Vložíme tam:
@reboot /opt/vouch-proxy/vouch-proxy-master
Uložit a reboot server:
reboot
9) nastavení proxy
Předpoklad je nainstalovaný a nakonfigurovaný SRV_PROXY - návod zde: https://intranet.rs-kovarik.cz/srv_proxy96279
Příklad konfigurace na SRV_PROXY pro VOUCH proxy:
<IfModule mod_ssl.c>
<VirtualHost *:443>
ServerName vouch.rs-kovarik.czServerAdmin info@rs-kovarik.cz
DocumentRoot /var/www/htmlAlias /.well-known/acme-challenge/ "/var/www/html/.well-known/acme-challenge/"
ProxyPass /.well-known/acme-challenge !ProxyPreserveHost on
ProxyPass / http://192.168.1.34:9090/
ProxyPassReverse / http://192.168.1.34:9090/SSLCertificateFile /etc/letsencrypt/live/proxy.rs-kovarik.cz/fullchain.pem
SSLCertificateKeyFile /etc/letsencrypt/live/proxy.rs-kovarik.cz/privkey.pem
Include /etc/letsencrypt/options-ssl-apache.conf
</VirtualHost>
</IfModule>
Pokud je SRV_PROXY nastaven správně, tak po zadani vasi adresy např. https://vouch.rs-kovarik.cz/logout vidíme následující:
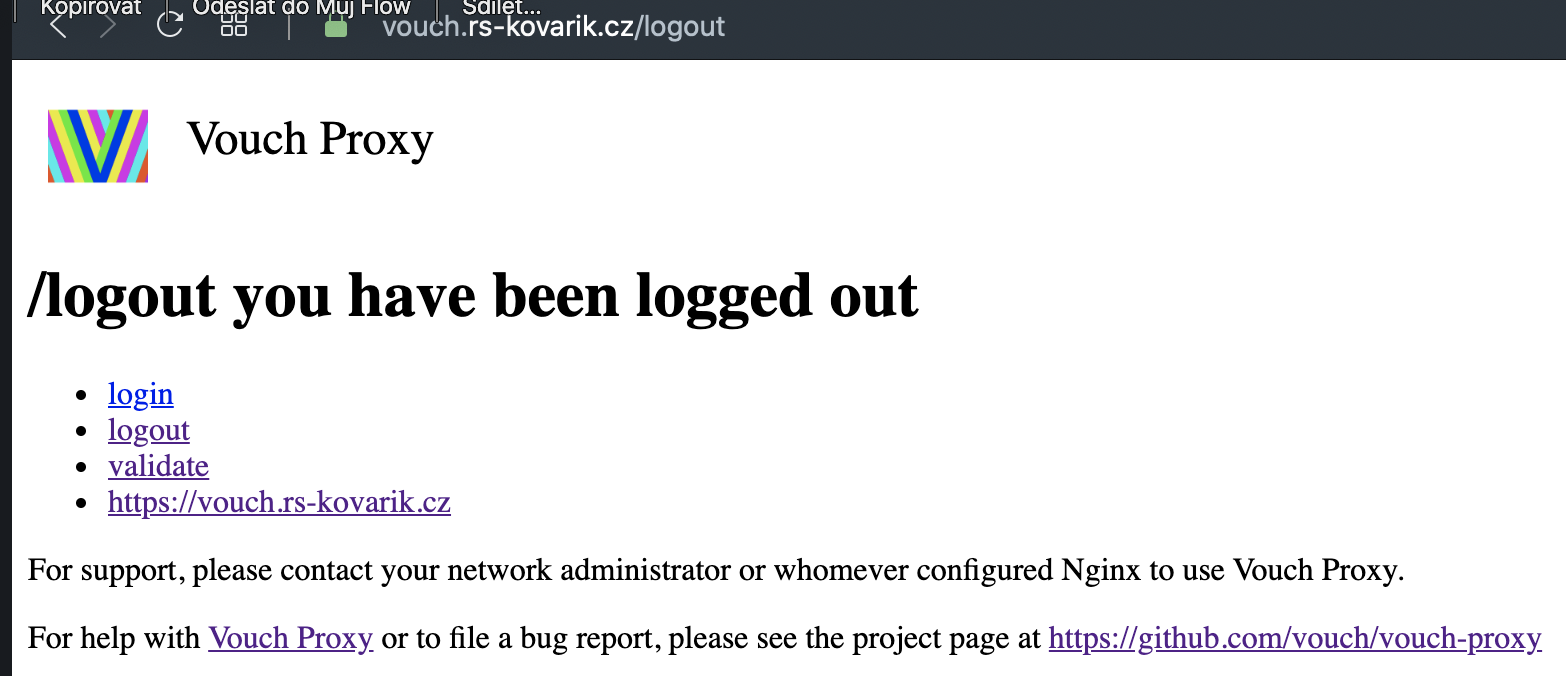
Stejný odkaz (https://vouch.rs-kovarik.cz/logout) používáme v budoucnu pro logout z VOUCH proxy (a ostatnich napojenych systemu).
10) předpoklad pro funkčnost SSO
Předpoklad pro plnou funkčnost SSO je instalace SRV_NGINX, který bude redirectovat na vouch proxy.
Návod je uveden v zde: https://intranet.rs-kovarik.cz/srv_nginx